ASE Tutorials
- Introduction to ASE
- Getting Started
- Adsorption
- Transition States
- Error Estimation and Density of States
Introduction to ASE
Contents
Atomic Simulation Environment (ASE)
Currently, most of us at SUNCAT use the Quantum ESPRESSO calculator as implemented in the Atomic Simulation Envrionment (ASE) for density functional theory (DFT) calculations. ASE provides Python modules for manipulating atoms, performing calculations, and analyzing and visualizing the results. ASE scripts are simply regular Python scripts that incorporate the ASE modules. For detailed documentation, refer to the official ASE websites. We will be demonstrating all the features you will need to use on the project website, but you may want to explore additional functionality on your own.
Here is an example of a few commonly used modules for a calculation and how you would use them in your Python scripts:
from ase import Atoms
from ase.constraints import FixAtoms
from ase import optimize
from espresso import espresso
import numpy as np
The modules provide functions that can be used for setting up the system and performing calculations. The ase.optimize module is needed for performing geometry optimizations, the espresso module is needed to use the Quantum ESPRESSO calculator, and the numpy module is needed for using certain mathematical functions.
Typically, the script will first read a trajectory file (.traj) that contains the structure, then set up the Quantum ESPRESSO calculator, and then perform the calculation (often a structural optimization). You can use the ASE graphical user interface ase-gui to view trajectory files or to setup or modify structures. To visualize a trajectory file, simply type:
ase-gui <trajectory_file>.traj
ASE supports a variety of file formats. More information about ASE can be found in the official documentation.
Graphical User Interface (ase-gui)
As mentioned above, you can use the graphical user interface to view atomic structures. It is also convenient for adding or manipulating atoms inside your system. Read all the details here.
Download an example and take a look:
wget http://chemeng444.github.io/ASE/example.traj
ase-gui example.traj
You should see the following window:
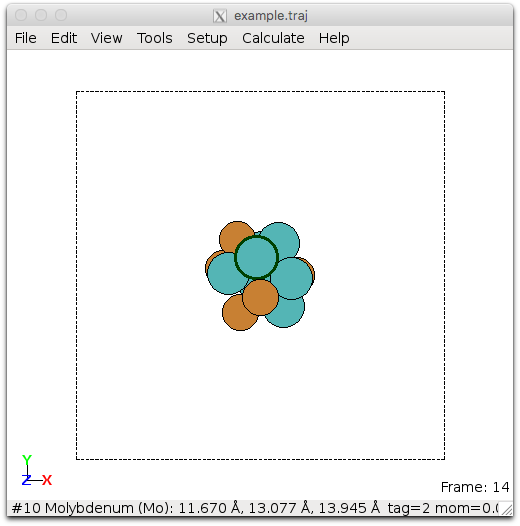
ASE GUI interface
To add an atom, select an existing atom and go to Edit > Add atoms or press Ctrl+A. You should then see the following window pop up:
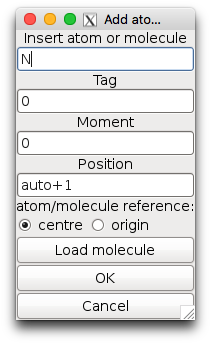
Adding an atom
After selecting OK, the atom will be placed on top of the atom you selected. If you did not select an atom, the new atom will be centered in the unit cell. If you want to move the atom, you can use Tools > Move atoms or Ctrl+M. The atom should have a green outline and you can use your arrow keys to move its position. You can simply hold down Ctrl to select multiple atoms.
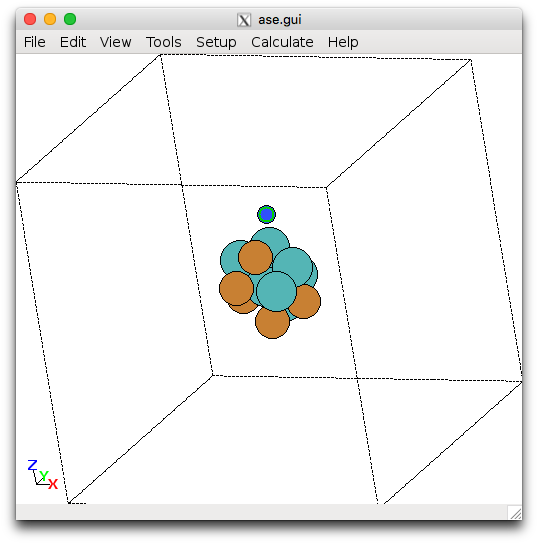
Moving an atom
For the extended surfaces (e.g., 111) you can repeat the slab. This is convenient for identifying symmetric sites, which might not be obvious at first glance from the unit cell. To do this:
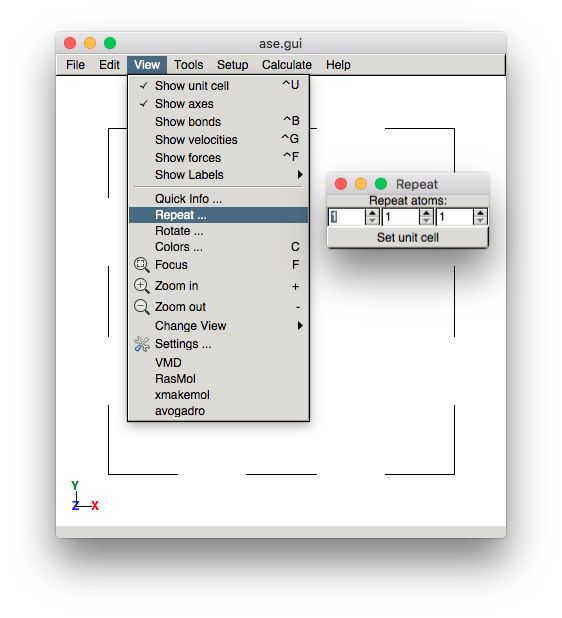
Repeating a slab
Next: move on to Getting Started when you’re ready to start doing some DFT!